How To Setup And Manage Photos For Google My Business
They say that a picture is worth a thousand words, and while this is a worn-out cliché, the phrase still holds a lot of validity, especially online. Why? Well, more and more businesses are uploading photos to Google My Business to get their message across.
Photos are a lot more attention-grabbing than text, and the right picture can convey your point much more quickly than a block of text (who wants to read anymore?).
A Picture is Worth a Thousand Search Terms
Trends online show that pictures are rapidly becoming just as important as great content and messaging on your website. The same holds true for local listings and Google My Business.
If you want search engines to take your listings seriously and get you ranked in the local stack, then you have to post pictures that show off your work and/or place of business.
It doesn’t matter if you have a storefront or not, photos are critical for local stack success. Before you start uploading photos to Google My Business, you’ll first need to learn what types of photos you should upload, and how to upload photos properly.
Uploading Photos to Google My Business
Uploading photos to Google My Business is relatively simple; however, there are a few important steps to keep in mind as you are going through the upload process.
- Log into your account and go to the main screen
- Click on manage photos at the top of the screen
![uploading photos to Google My Business]()
- From here, you will be able to upload photos directly to Google My Business. Keep in mind the different categories of pictures and what they mean. (We will explore this more thoroughly in the next part of this post).

Alternatively, you can use the Google My Business app to upload photos directly from your phone.
Comment On and Geotag Photos
Now that your photos are uploaded to Google My Business, you will want to update them with comments and a geotag. This additional information should include a detailed description of the photo as well as your company name. This is extremely important for the local stack; the more information you can give about your photos the better off you’ll be.
To do this:
- Navigate over to your Google Plus Page and click on photos.
- Click on “Business Photos”.
- Select the photo that needs commented on as well as geotagged
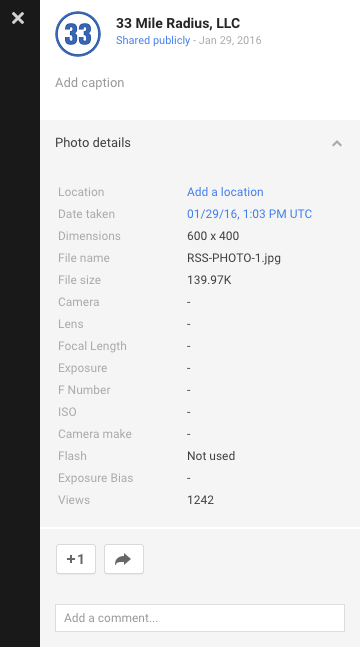
- Click “Add Caption” to add a description of the photo
- Click “Add Location” to provide a location of where the photo was taken
Types of Photos
Before you start uploading photos, be sure that you are categorizing them correctly. The type of photos you’ll want to upload depends on whether you service clients at your office or not. Either way, this is a good time to make sure that you are set up correctly. This is especially important for home service contractors.
To Check:
- Go to the make page in Google My Business and click Edit.
- Click Address and make sure the following box in the picture below is checked if you provide services at your clients’ location. If you do both, be sure to have both boxes checked
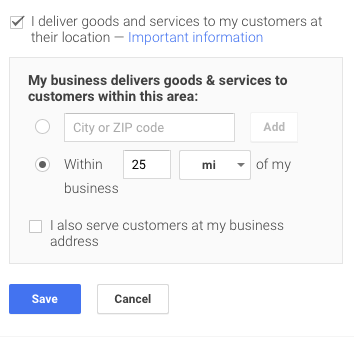
Photo Categories
Depending on the type of business you have, there are different options for categories of photos. For home service contractors the categories are:
- Identity Photos – Always include your logo, profile picture, and cover photo.
- Photos at Work – Include at least 3 photos of you at the job or working with a client. Be sure to include team members and customers in the photos!
- Team Photos – Include at least 3 photos of your management team and employees. Try to make them personal to humanize your business.
- Additional Photos – Include any other relevant photos regarding your business and services.
For the complete list of types of photos see check here.
Get Going!
Now you know how to upload photos to your Google My Business correctly. Keep in mind that the more photos you add, the better rankings you will have in the local stack and be sure to have a plan to get google reviews! One final tip: be sure to have fun when taking the photos. This will make your business stand out even more from your competitors.
As always, be sure to reach out to us if you need help!